Tabby Panel – Part 1
My dad and I are collaborating on a marquetry project: an homage to Fra Giovanni da Verona, an Italian monk and woodworker. He died in 1525, so next year is the 500th anniversary of his death.
Fra Giovanni’s artwork decorates the Benedictine Abbey of Monte Oliveto Maggiore in Tuscany. Among other things, he created panels with images of arches framing animals.
One such image is a tabby cat seated under an arch, with an Italian landscape in the background.

Image from the book Il coro intarsiato dell’Abbazia di Monte Oliveto Maggiore by Giovanni Brizzi
My dad and I decided that I would make the cat, and he would make the background.
I created a drawing of a cat in the same pose as the cat in Fra Giovanni’s panel.

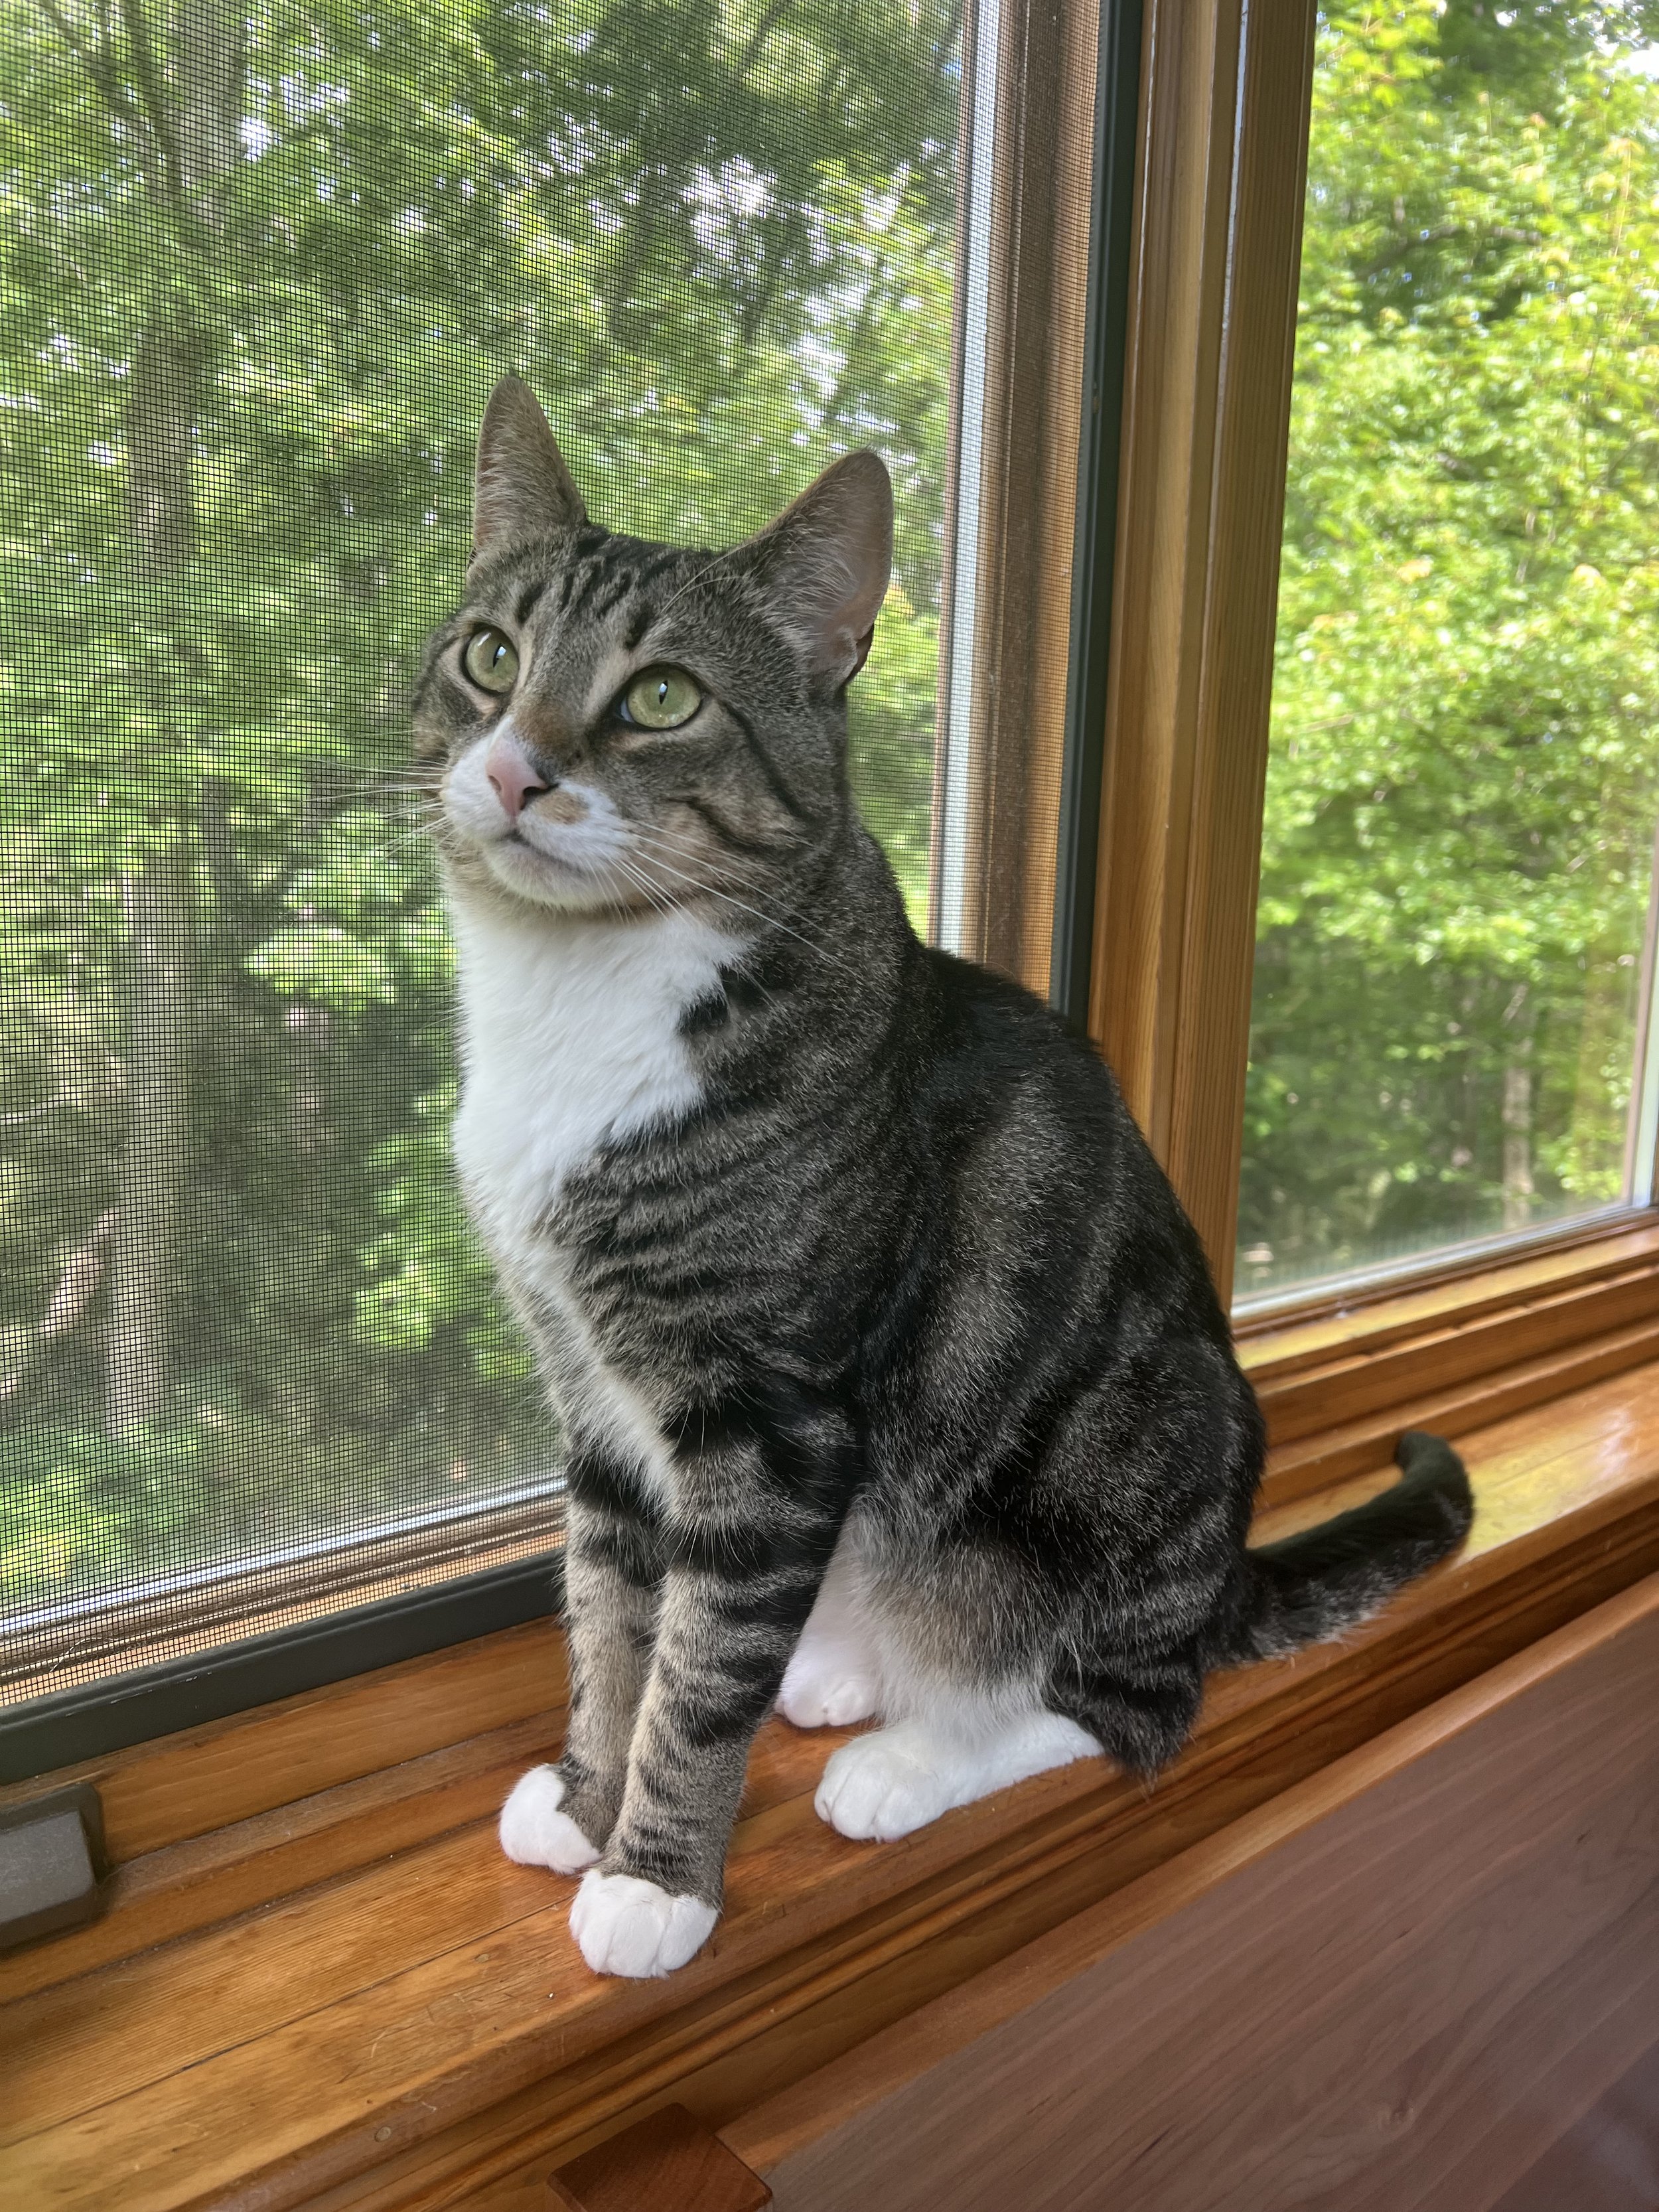
The cat in my drawing is a mashup of Fra Giovanni’s cat and my own tabby cat, Gabe. In spite of being an absolute goblin, Gabe is very sweet and extremely photogenic.
The marquetry cat’s face took me about three days to complete.

In total, the face consists of over 60 tiny pieces of wood. I used at least ten different types of wood to make the face:
black ebony and bog oak for the black stripes
teak and oak for the brown stripes
holly for the white highlights
nara for the nose
walnut, zebrawood, and macassar ebony for the ears
a particularly green piece of poplar for the eyes
I sand shaded some of the veneer on the face to give it additional depth and detail. I will write a post about sand shading in the future, but essentially, the process involves scorching the edge of a piece of veneer by dipping it in very hot, fine-grained sand.
My supply of some of the veneers – particularly the bright white holly – is limited, so I tried to make use of every scrap that I could. I keep cups of holly and ebony scraps on the workbench and will use pieces until they are too small to cut on the scroll saw.
After I finished the cat’s face, I made the torso out of just two pieces of teak and bog oak, in one long cut on the scroll saw that took me a couple hours to complete.

Earlier this year, I started experimenting with abstract squiggly patterns in marquetry. The patterns on the tabby cat were similar to this in a lot of ways.

Before cutting the pattern on the tabby’s back, I had to prep the veneer by rubbing wood glue into the wood fibers and covering one side with blue tape. If I hadn’t done this, the veneer would have fallen apart as I cut it, since the shape that I cut was so elaborate.
After about five days of work, the cat was complete, and I could hand the project over to my dad to work on the background.
